
Tools: Intro to GIT
by Craig Miller. Thanks. Modified by Deid Reimer so if it doesn’t work it’s my fault.
Easy management of your projects |
git is open source industry standard distributed revision control system (RCS). There have been other RCS such as SVN and CVS. gitwas developed by Linus Torvalds the author and maintainer of the Linux Kernel. There are thousands of Linux developers using git.
What is a Revision Control System?
A RCS is software which allows multiple users to save their work in an ordered fashion. The RCS takes care of merging files when multiple people are working on the same file. Additionally it acts as a chronological snapshot of the work, allowing the developer to easily roll back to previous versions.
Why do I want to use git?
Although initially developed to be used with the Linux Kernel, git has become the standard RCS for application development as well. Because it was designed from the ground up to be a distributed system, copies of the git repository can be located at different locations, by different people, and git handles the merging of the differences. This means that using free services such as github or gitlab become an automatic back up of your project, complete with all of the versioning history.
Installing git
Installing git is quite easy, on Pi Linux, just type:
sudo apt-get install git
Creating a git repository
It is easy to create a git repository, just:
- create a directory for your project
- initialize git
- create some initial files, your software, a README.md, and a License (GPLv2, BSD, Mozilla, whatever).
- check in the initial files into the
gitrepository
creat the git repository
Creating a git repository is as easy as changing to your project subdirectory, and typing:
git init
It is also a good idea to add your name and email address to the repository:
git config --global user.name "Craig Miller"   Or Deid...
git config --global user.email cvmiller@gmail.com
add some files
Of course the whole point is adding your project files. Copy or move your project files into the project subdirectory.
If you are going to share your project with the world, then it is a good idea to have a README.md file explaining what your project is, and how to use it. And a license file. I recommend an open source license such as GPL (Gnu Public License) or BSD (Berkeley Standard Distribution). You can find these online.
adding the project files to the git repository
Once your project files, README.md, license files are in the subdirectory, it is time to add them to the repository. Type the following:git add .
The period means add everything in this directory
Check the files into the repository
The files have been added, so the repository knows about them, but any changes you may have made have not been committed to the repository. Think of it as a local copy which no one else can see. When ready, commit the files to the repository:
git commit -a
An editor will pop up, asking you to type a description of this commit. Type something that makes sense to you (and others). Since this is the initial commit, something like the following is common:
Initial commit
You are all done, take a break, and get a coffee!
Displaying the current commit etc. status – from discussions at the Saturday Presentation
git status
On branch master
Your branch is up-to-date with ‘origin/master’.
Changes not staged for commit:
(use “git add <file>…” to update what will be committed)
(use “git checkout — <file>…” to discard changes in working directory)
modified: pistuff.txt
Untracked files:
(use “git add <file>…” to include in what will be committed)
.gitignore
no changes added to commit (use “git add” and/or “git commit -a”)
git add pistuff.txt
git status
On branch master
Your branch is up-to-date with ‘origin/master’.
Changes to be committed:
(use “git reset HEAD <file>…” to unstage)
modified: pistuff.txt
Untracked files:
(use “git add <file>…” to include in what will be committed)
.gitignore
git add .gitignore git status
On branch master
Your branch is up-to-date with ‘origin/master’.
Changes to be committed:
(use “git reset HEAD <file>…” to unstage)
new file: .gitignore
modified: pistuff.txt
git commit -a -m “Added .gitignore and modified pistuff for git status demo”
[master 065781a] Added .gitignore and modified pistuff for git status demo 2 files changed, 2 insertions(+) create mode 100644 .gitignoregit status
On branch masterYour branch is ahead of ‘origin/master’ by 1 commit. (use “git push” to publish your local commits)nothing to commit, working tree clean
And, everything is up to date.
- The file .gitignore contains the names of files and directories that we want git to ignore. In other words not add them or commit them when . (all) is used.
What have I done?
git log
pi@rasport4:~/gitDemo/pi $ git log
commit 065781ab3e21939fb462ec29f8c6ba8ccc5ca30d
Author: deid <deid@drsol.com>
Date: Sun May 12 09:07:25 2019 -0700
Added .gitignore and modified pistuff for git status demo
commit 129a1fb2edb53d5d9d7dae02822cc717cf01635f
Author: deid <deid@drsol.com>
Date: Sat May 11 11:35:13 2019 -0700
added .gitignore to be added to notes
commit e9fa696861e8091d6b7feb2771e5eb96473e5ab3
Author: deid <deid@drsol.com>
Date: Sat May 11 11:18:43 2019 -0700
todo
commit 5aba24e072db47437e147d05210b8aee0e3dc5a2
Author: deid <deid@drsol.com>
Date: Sat May 11 10:48:27 2019 -0700
Added fore fathers.
git diffdiff –git a/pistuff.txt b/pistuff.txt
index 6f3253f..27e7784 100644
— a/pistuff.txt
+++ b/pistuff.txt
@@ -8,3 +8,6 @@ git diff
.gitignore will ignore its contents
Added this so git status will show something.
+
+a line for diff
+
Or a GUI way of Viewing git version info and status.
git doesn’t have to be all command line, although most folks probably use the CLI.
gitk
A useful tool to see the history, and what has changed in a repository is gitk. It shows those comments you made when you made your commits as well as a chronological history of your commits, high lighting the differences with each commit.
You will have to install gitk:
sudo apt-get install gitk
then:
gitk <repo name>
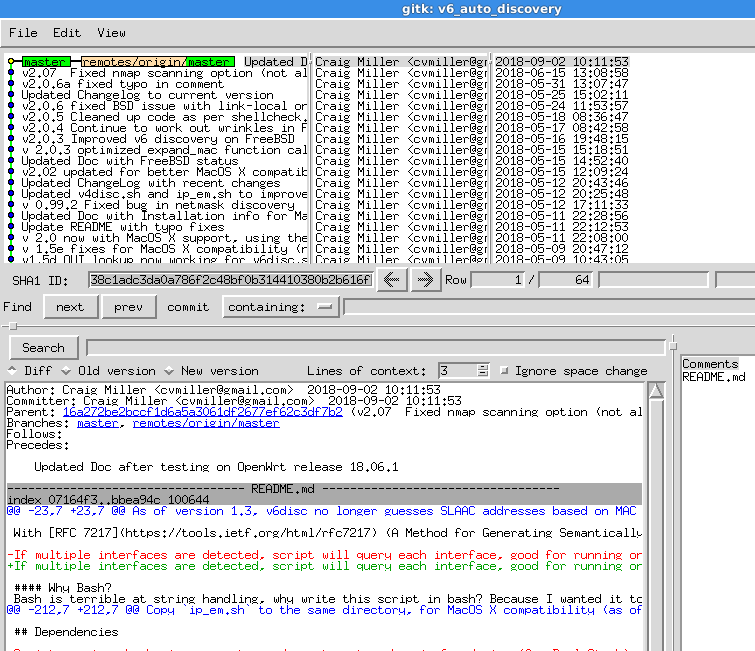
As you can see it is a good idea to add the version number of your project in the commit comment.
Extra Credit: publishing your git repo on github
So far your repository is only located on your computer. If your computer crashes with an unrecoverable hard drive (or SSD), then all of your hard work is lost. Fortunately, there are services such as github or gitlab which will not only store your repository, but share it with the world, if you would like.
To create a copy of your repository on github you just need to do the following steps:
- Create an account on github
- Use https: and ID and PW or
- Copy and paste your public ssh key to github
- Use https: and ID and PW or
- Configure git on your machine to
pushthe repo to github - Push your repo
Steps 1, and 2 only have to be done once. Step 3 only has to be done once per repository (each project should be its own repository)
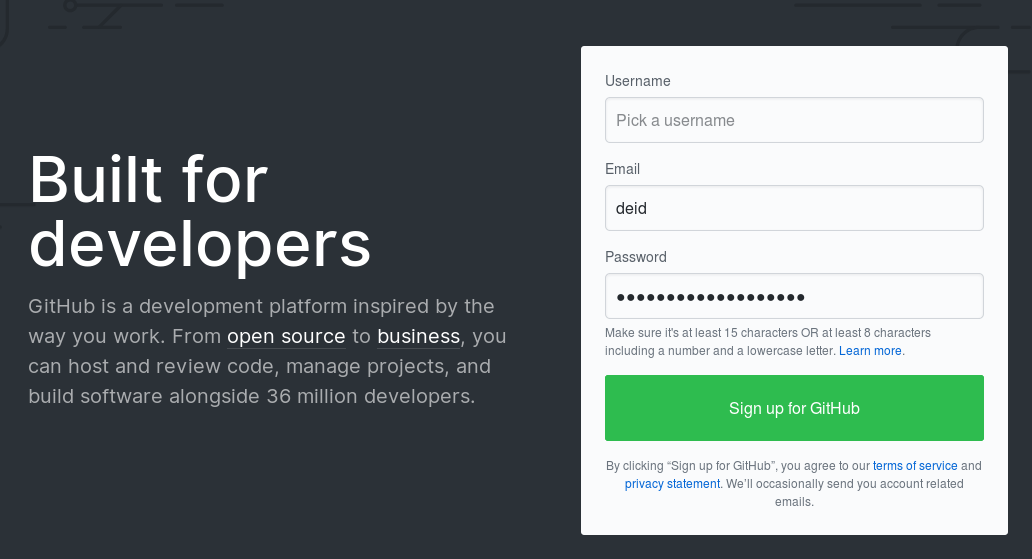
Create an account on github.com
Go to github.com and create an account.
Create a new repository on github
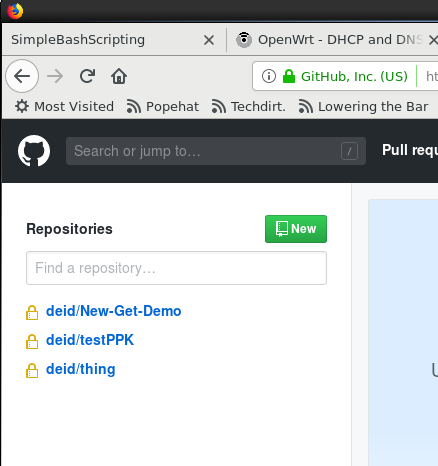
Click the + -> New Repository on the github’s web interface, or the New in the upper left. And follow the directions. Once the Repository is created, it will give you a few lines to paste into your terminal to setup your local git to push up to github. Github has documentation on setting up a remote.
How do I authenticate?
Using PW and https:
The lines will look something like:
- git remote add origin https://github.com/deid/thing.git
- git push -u origin master
Using ssh and keys.
Create an ssh key. I created one for gethub – different from my other ones.
This creates a bit of complexity.ssh-keygen -t rsaWhen prompted for a file name to save the keys e.g. “Enter file in which to save the key (/home/deid/.ssh/id_rsa):” Don’t take the default. Name it something else and save it in whatever directory makes sense to you.
Now that you have ssh rsa keys, cat the public key
cat <whatever you named it>
ssh-rsa AAAAB3NzaC1yc2EAAAADAQABAAABAQDPXgkmnGoPL7/KSP3+QqLPH8vfEbKlmBCgS+8UQ6ZTX51WPaNSfu13M6U8Mi6UGyfHoZApUCfS60QRIr1wedD37E+lmqPJVpvnAHA4JACOavhcUuCMlbBiEh1dDo9/ji58AkdGhRYUwDM8CpN6qAsawVzBt2of7IOEPfJ4o8RgxOWtTnmkRAOZCCjw+/5ZaZ4/OFJafQZTc9WRgSiRbt6KYrZ2rGfQUYqxuJkG+mok2/QwxxpmzbwiWie2plI+0zrYFSDEbcVsLxi13971aVPSnnsTBEk50+nuEcwc2j7puIByuSJ2PDbxCAZHUc/8Ghrl8tD3Iu2wvsioeRC+VBDB cvmiller@asus_c201pa
- Copy the big line, and paste it into your github account (on the web page) , <under your profile> -> Settings -> SSH and GPG Keys -> New SSH Key. Save.
- edit .ssh/config in your home directory and add the following: (assuming this is for the pi users and the Identity file (ssh keys) are named like this. This tells git which ssh ppk identity file to use.
Host github.com
HostName github.com
IdentityFile /home/pi/gitDemo/gitdemo
user git
- Tell github to use ssh rather than https:
- git remote add origin git@github.com:<Username>/<Project>.git
- git push -u origin master
Changes to your project
Then to push further changes to your project up to github, just type:
<make changes> <test changes?>git add . # to add the changesgit commit -a # to commit the changesgit push # to send the changes to github
Point your browser to your project on github and see your files you just pushed
15 Feb 2019 Modified 12 May 2019 Deid Reimer